Thursday, December 6, 2012
Wednesday, December 5, 2012
24 Hour Countdown!
This time tomorrow we'll be about to start demo day! Here's our to do list for today. Shouldn't be too bad
TO DO:
[Completed
In progress]
MECHANICAL
·
Wooden Box for the water pump box
· Plastic
cover for the water pump
· Latch
on spout system
· Tube
system from spout to water tank
ELECTRICAL
· LEDs
super glued into holes
·
Longer leads on short guy purple LED
·
Leads into Leaf
(mostly)
SOFTWARE
· Code
for our demo day, agreed upon yesterday
· One
more look into button pressing finickyness
OTHER
·
(Sam) Print out settings guide/create
account
·
(Sam) Pick up seeds to hand out to the class
·
(Gracie) Pick up watering
can
Tuesday, December 4, 2012
2 days left!
It's crunch time! Today we worked for a long time on integrating everything. I've been spending lots of time in the machine shop trying to line up holes for the housing and it's finally together! We have some adjustments to make tomorrow to make it look better. Today we tested it with our water tank and our tank sensor and surprisingly everything integrated nicely.
SLEEEEEEEEPPPP!
SLEEEEEEEEPPPP!
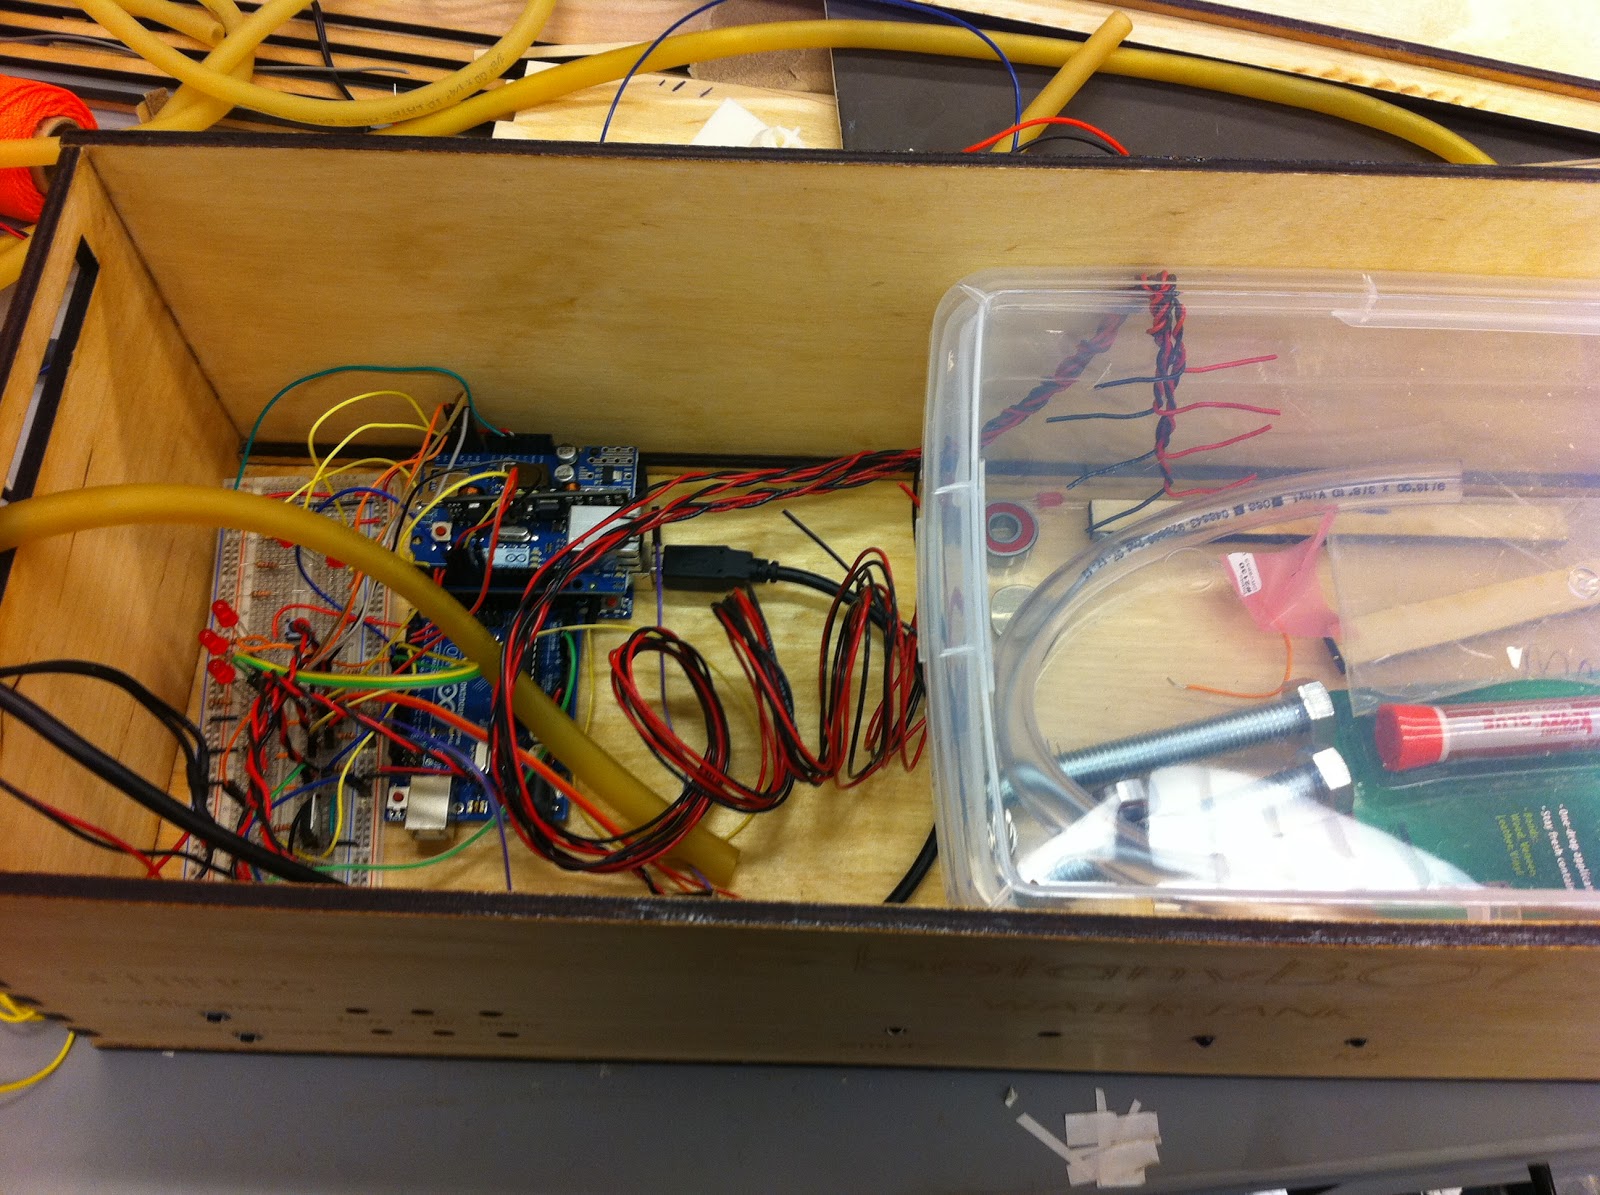
Think Outside the Box
It's been a PoE marathon this past week so i'm going to split this into a few different posts. First, the box! We had it laser cut last week and then we got to assemble this week. First, we had fun experimenting with wood glue and we ended up clamping our box by wrapping the whole thing in orange string. Next, we tried our hand at polyurethane even though we were terrified to ruin our box. It all worked out though and now we have a beautiful box! Next, we put LED's and buttons in our box. We have 3 turquoise, 3 purple, 2 green, a yellow, and red. We also have a hinged door that holds the tubing to refill the box (that has yet to be installed yet though). Here is our box in various stages of completeness!


Tuesday, November 27, 2012
Moving Water!
Tuesday, November 13, 2012
Sensors Controlling Sensors
Thursday, November 8, 2012
Pump Assembly!
We've been working really hard on the pump, so here's an update!
This Monday, Sam machined our parts for our motor, so we were all set to put the pieces together! She made an arm to hold the bearings, two shoulder bolts, and a shaft to put over the motor.

This Thursday we were finally able to put everything together and test it! Here's Gracie getting the motor ready to run for our first test.

Unfortunately, we have to make a few adjustments to the pump before it will work, but it's on its way! Our pump was able to spin the bearings without the tubing, but with the tubing in place it was not strong enough. This may be for several reasons. One thing we're going to look at is whether we're giving the motor enough current. Second, we're going to get some different tubing that is a little less stiff so that there is less resistant against the motor. Hopefully by the end of this weekend we should have some of these motors addressed.

Don't forget to water your plants today!
Wednesday, November 7, 2012
More Electrical Things!
 |
| DC Motor Controller! |
Monday, October 29, 2012
Moisture Sensor Tested in Soil: Success!
Before today, we had only tested the leads in air (touching and not touching). Today we tested the moisture sensor in soil with varying degrees of water added. The test confirmed that the system is functional. The values that we obtain from the arduino (via serial) are as follows:
In air, not touching: ~0
In air, touching: ~1023
In soil,
--very wet: ~900
--optimal: 700-800
--needs water: ~650
--definitely needs water: <625
Python code to do something with the values read from serial is given below:
#import libraries
import serial
import math
#open serial communication
arduino = serial.Serial('/dev/ttyACM0', 9600)
if serial.Serial.inWaiting >= 5:
#control corresponds to 100% light transmittance (in absence of any #petri dish); each respective sample reading corresponds to the light #transmittance through that petri dish.
val1 = float(arduino.readline())
val2 = float(arduino.readline())
val3 = float(arduino.readline())
val4 = float(arduino.readline())
val5 = float(arduino.readline())
#calculate soil moisture reading
moistureValue = float((val1 + val2 + val3 + val4 + val5)/5)
if moistureValue < 625:
print("omg so thirsty so thirsty need water")
elif moistureValue > 625 and moistureValue < 700:
print("I'm starting to get thirsty")
elif moistureValue > 700 and moistureValue < 800:
print("I feel so hydrated!")
elif moistureValue > 800:
print("Gross, I feel bloated")
#print out absorbance values in neat table
print "moisture value: " + str(moistureValue)
In air, not touching: ~0
In air, touching: ~1023
In soil,
--very wet: ~900
--optimal: 700-800
--needs water: ~650
--definitely needs water: <625
 |
| Leads (moisture sensor) in soil. |
Python code to do something with the values read from serial is given below:
#import libraries
import serial
import math
#open serial communication
arduino = serial.Serial('/dev/ttyACM0', 9600)
if serial.Serial.inWaiting >= 5:
#control corresponds to 100% light transmittance (in absence of any #petri dish); each respective sample reading corresponds to the light #transmittance through that petri dish.
val1 = float(arduino.readline())
val2 = float(arduino.readline())
val3 = float(arduino.readline())
val4 = float(arduino.readline())
val5 = float(arduino.readline())
#calculate soil moisture reading
moistureValue = float((val1 + val2 + val3 + val4 + val5)/5)
if moistureValue < 625:
print("omg so thirsty so thirsty need water")
elif moistureValue > 625 and moistureValue < 700:
print("I'm starting to get thirsty")
elif moistureValue > 700 and moistureValue < 800:
print("I feel so hydrated!")
elif moistureValue > 800:
print("Gross, I feel bloated")
#print out absorbance values in neat table
print "moisture value: " + str(moistureValue)
Parenting Style mode selector complete and integrated with moisture sensor
The mode selector is now complete! The button switches through the three LEDs (modes). After five seconds, the LED fades away to a dim setting so that we can conserve power in the long run.
The last step will be to clean up the code (for modularity).
Arduino code for the LED system integrated with the moisture sensor reading is given below:
//initialize constants
const int buttonPin = 2;
const int LED1 = 11;
const int LED2 = 10;
const int LED3 = 9;
const int moistureSensor = 0;
const unsigned long deBounceDelay = 200;
const unsigned long moistureDelay = 5000;
//initialize variables
int buttonState = 0;
int lastButtonState = 0;
int mode=1;
int fadeValue;
int moistureReading = 0;
unsigned long deBounceTimer = 0;
unsigned long moistureTimer = 0;
unsigned long startTime;
//set-up interrupt
void setup() {
//initialize each of the three LED pins as outputs
pinMode(LED1, OUTPUT);
pinMode(LED2, OUTPUT);
pinMode(LED3, OUTPUT);
//initialize the pushButton pin as an input
pinMode (buttonPin, INPUT);
//initialize serial communication; mid-range data rate 9600 bps
Serial.begin(9600);
//attachInterrupt(0, off, RISING);
}
void loop() {
buttonCheck();
switch (mode) {
case 1:
off();
digitalWrite(LED1, HIGH);
startTime = millis();
fadeValue = 255;
while(mode==1) {
buttonCheck();
readMoisture();
if((fadeValue>55)&&((millis()-startTime) > 5000)) {
for(fadeValue = 255; fadeValue >=50; fadeValue -=5) {
analogWrite(LED1, fadeValue);
delay(30);
}
}
}
break;
case 2:
off();
digitalWrite(LED2, HIGH);
startTime = millis();
fadeValue = 255;
while(mode==2) {
buttonCheck();
readMoisture();
if((fadeValue>55)&&((millis()-startTime) > 5000)) {
for(fadeValue = 255; fadeValue >=50; fadeValue -=5) {
analogWrite(LED2, fadeValue);
delay(30);
}
}
}
break;
case 3:
off();
digitalWrite(LED3, HIGH);
startTime = millis();
fadeValue = 255;
while(mode==3) {
buttonCheck();
readMoisture();
if((fadeValue>55)&&((millis()-startTime) > 5000)) {
for(fadeValue = 255; fadeValue >=50; fadeValue -=5) {
analogWrite(LED3, fadeValue);
delay(30);
}
}
}
break;
}
}
void buttonCheck() {
buttonState = digitalRead(buttonPin);
if (!buttonState&&lastButtonState&&(millis()-deBounceTimer)>deBounceDelay){
mode++;
if(mode>3)mode=1;
lastButtonState = buttonState;
deBounceTimer = millis();
}
if (buttonState&&!lastButtonState&&(millis()-deBounceTimer)>deBounceDelay){
lastButtonState = buttonState;
deBounceTimer = millis();
}
}
void readMoisture() {
if ((millis()-moistureTimer)>moistureDelay){
moistureReading = analogRead(moistureSensor);
moistureTimer=millis();
Serial.print("moisture sensor reads ");
Serial.println( moistureReading);
}
}
void off() {
digitalWrite(LED1, LOW);
digitalWrite(LED2, LOW);
digitalWrite(LED3, LOW);
}
 |
| Cleaned-up LED and pushbutton system. |
The last step will be to clean up the code (for modularity).
Arduino code for the LED system integrated with the moisture sensor reading is given below:
//initialize constants
const int buttonPin = 2;
const int LED1 = 11;
const int LED2 = 10;
const int LED3 = 9;
const int moistureSensor = 0;
const unsigned long deBounceDelay = 200;
const unsigned long moistureDelay = 5000;
//initialize variables
int buttonState = 0;
int lastButtonState = 0;
int mode=1;
int fadeValue;
int moistureReading = 0;
unsigned long deBounceTimer = 0;
unsigned long moistureTimer = 0;
unsigned long startTime;
//set-up interrupt
void setup() {
//initialize each of the three LED pins as outputs
pinMode(LED1, OUTPUT);
pinMode(LED2, OUTPUT);
pinMode(LED3, OUTPUT);
//initialize the pushButton pin as an input
pinMode (buttonPin, INPUT);
//initialize serial communication; mid-range data rate 9600 bps
Serial.begin(9600);
//attachInterrupt(0, off, RISING);
}
void loop() {
buttonCheck();
switch (mode) {
case 1:
off();
digitalWrite(LED1, HIGH);
startTime = millis();
fadeValue = 255;
while(mode==1) {
buttonCheck();
readMoisture();
if((fadeValue>55)&&((millis()-startTime) > 5000)) {
for(fadeValue = 255; fadeValue >=50; fadeValue -=5) {
analogWrite(LED1, fadeValue);
delay(30);
}
}
}
break;
case 2:
off();
digitalWrite(LED2, HIGH);
startTime = millis();
fadeValue = 255;
while(mode==2) {
buttonCheck();
readMoisture();
if((fadeValue>55)&&((millis()-startTime) > 5000)) {
for(fadeValue = 255; fadeValue >=50; fadeValue -=5) {
analogWrite(LED2, fadeValue);
delay(30);
}
}
}
break;
case 3:
off();
digitalWrite(LED3, HIGH);
startTime = millis();
fadeValue = 255;
while(mode==3) {
buttonCheck();
readMoisture();
if((fadeValue>55)&&((millis()-startTime) > 5000)) {
for(fadeValue = 255; fadeValue >=50; fadeValue -=5) {
analogWrite(LED3, fadeValue);
delay(30);
}
}
}
break;
}
}
void buttonCheck() {
buttonState = digitalRead(buttonPin);
if (!buttonState&&lastButtonState&&(millis()-deBounceTimer)>deBounceDelay){
mode++;
if(mode>3)mode=1;
lastButtonState = buttonState;
deBounceTimer = millis();
}
if (buttonState&&!lastButtonState&&(millis()-deBounceTimer)>deBounceDelay){
lastButtonState = buttonState;
deBounceTimer = millis();
}
}
void readMoisture() {
if ((millis()-moistureTimer)>moistureDelay){
moistureReading = analogRead(moistureSensor);
moistureTimer=millis();
Serial.print("moisture sensor reads ");
Serial.println( moistureReading);
}
}
void off() {
digitalWrite(LED1, LOW);
digitalWrite(LED2, LOW);
digitalWrite(LED3, LOW);
}
Thursday, October 25, 2012
Parenting Style--Mode Switching working
We've modified the blinky lights lab in order to blink through three LEDs (one for each parenting style mode). What do we mean by parenting style? As previously posted, we want the user to be able to choose how often they are notified by the system. He or she will be able to choose one of the following modes:
* Hands-off
* Active
* Helicopter
The next step is to expand the functionality so that the LEDs dim over time (to save power in the long run). We are also in the process of creating a mini prototype to show how the system will look in the plastic body of our system.
* Hands-off
* Active
* Helicopter
 |
| Working blinky light system (switches through three lights for each button press). |
The next step is to expand the functionality so that the LEDs dim over time (to save power in the long run). We are also in the process of creating a mini prototype to show how the system will look in the plastic body of our system.
Be Prepared.
 |
| Gearing up for our first Design Review - 10/25/12 |
Display screen!
Last night Melisa got the screen working! We may buy a better one at some point but for right now we have a working display! On today's agenda is building a peristaltic pump and working on software.
 |
| Display screen! |
Monday, October 22, 2012
Update: Moisture Sensor
 |
| Caught sensing the moisture - 10/22/12 |
Now to work on making it prettier, smaller, and maybe modular.
(Update) Interaction Design
 |
| Isometric view of whole system (10/22/2012) |
 | |||
| Top view. Logo visible from top. Diffused glow visible. |
 |
| Front view. LCD display visible. |
 |
| Left view. On/Off button visible. |
 |
| Right view. Three mode options (barely) visible. |
The first CAD modeling was done to be discussed in class today (snapshots below). For now, the product has the following components:
- Top Plastic cover, on which the plant pot will sit (LOGO visible on top)
- Notification system, with diffused LED light that becomes brighter as more user attention is needed. This notification system uses the LCD display screen in order to communicate where the attention is needed. For the scope of our project, the only notification is to refill the water storage unit. We are designing it so that future expansion is easy: we could add sensors to detect the amount of light hitting the plant, the humidity of the room, etc. and have the notification system alert the user for all the situations.
- On/Off power button (left side)
- LCD screen (front side)--to display where attention is needed
- Level of involvement options (right side)--three options each with a push button selection
- Hands-off
- Present
- Helicopter
Background Information on Watering
Over the last few weeks, we collected bits on best practices for household plant care. Here's a compilation of the information that we want to keep in mind as we continue to design our system:
General Information on Watering:
[Dehydration]
Indoor Plant Care
Wikipedia: Houseplant
Guidelines for Watering Indoor Plants
General Information on Watering:
- Under-watering and over-watering can be detrimental to a houseplant; improper watering is the cause of most household plant problems.
- Best way to determine whether a plant needs to be watered is to check the soil moisture.
- Most potted plants must be allowed to reach an appropriate level of dryness between waterings.
- Amount of water needed per watering depends on the species of houseplant.
- Water should be poured slowly over the surface of the soil until is begins to drain out of the bottom of the pot.
- Soil should be dry 1/4 inches down
- Tapped pot should sound hollow
- Weight can be a good indicator for small household plants
- Water from the top until moisture drips out of the bottom of the pot.
- Discard draining water
- Don't let bottom portion of the pot stand in water
- Water from the bottom by placing the plant in saucer until the top of the soil is moist.
- Remove plant and let excess moisture drain out of the bottom.
- Never keep the plant in standing water continuously.
- NOTE: Water all plants from top once a month to prevent mineral or salts build-up (white/brown crusty material on soil/rim of pot).
- NOTE: Frequent watering with small amounts of water can lead to waterlogging
[Dehydration]
- Leaf growth is slow
- Leaves become translucent
- Leaves/flowers drop prematurely
- Leaf edges become brown and dried
- Lower leaves curl and yellow
- Young and old leaves fall at same time
- Root rot
- Standing water in bottom container
- Moldy flowers
- Leaves have brown soft rotten patches or fail to grow
Indoor Plant Care
Wikipedia: Houseplant
Guidelines for Watering Indoor Plants
Thursday, October 18, 2012
Moisture Sensor!
 |
| It works! - 10/18/12 |
Interaction Design Concept Sketching
 |
| Concept sketches for interaction design 10/18/2012 |
The interaction design concept sketching is well under way. Components include:
- Water Storage Unit refill notification
- Plant hydration state notification
- Power on/off
- Parenting style mode (hands-off, normal, helicopter)
- Opening for user to pour water into water storage unit
- Logo/instruction
Pump Received!
 |
| Testing out our first pump. - 10/18/12 |
.jpg)
Thursday, October 11, 2012
Subscribe to:
Posts (Atom)